
I WILL EXPLAIN THE HOW CAN WE INSTALL THE NEW SNO CLUSTER ON VMWARE
PREREQUESTS,
ONE LINUX MACHINE:
- RHEL or CENTOS
- HTTPD SERVER,dnsmasq server AND PXE SERVER on linux machine
- dns name entry, for api-int,api and *.apps addresses and this addresses have to resolve same ip address
STEP-1:
Create folder for cluster installation.
mkdir -p /var/www/html/hafifbilgiler
mkdir -p /data/SNO/SNO_4.14
mkdir -p /data/SNO/SNO_4.14/CLUSTERS/hafifbilgiler
mkdir -p /data/SNO/SNO_4.14/CLUSTERS/hafifbilgiler/installation-components
cd /data/SNO/SNO_4.14
STEP-2:
Obtain the iso files and oc client from redhat offical repo address. Also you can choose your version that you want.
OCP_VERSION=latest-4.14
curl -k https://mirror.openshift.com/pub/openshift-v4/clients/ocp/
 $OCP_VERSION/openshift-client-linux.tar.gz -o oc.tar.gz
curl -k https://mirror.openshift.com/pub/openshift-v4/clients/ocp/
$OCP_VERSION/openshift-install-linux.tar.gz -o openshift-install-linux.tar.gz
curl -L https://mirror.openshift.com/pub/openshift-v4/x86_
64/dependencies/rhcos/latest/rhcos-live-kernel-x86_64 -o kernel
curl -L https://mirror.openshift.com/pub/openshift-v4/x86_
64/dependencies/rhcos/latest/rhcos-live-initramfs.x86_64.img -o
initramfs.img
curl -L https://mirror.openshift.com/pub/openshift-v4/x86_
64/dependencies/rhcos/latest/rhcos-live-rootfs.x86_64.img -o
rootfs.img
STEP-3:
Copy the all iso files under the related area. For html server and pxe boot server.
cp data/SNO/SNO_4.14/kernel /var/lib/tftpboot/kernel
cp data/SNO/SNO_4.14/initramfs.img /var/lib/tftpboot/initramfs.img
cp data/SNO/SNO_4.14/rootfs.img /var/www/html/hafifbilgiler/rootfs.img
STEP-4:
Create new instal-config.yaml file with below template. Before we should obtain the pull_secret from redhat web site and ssh public key. If you don’t have public key you can create with below commands.
su hafifbilgiler
ssh-keygen
cat .ssh/id_rsa.pub
vim install-config.yamlapiVersion: v1
baseDomain: "your_base_domain_address"
proxy:
httpProxy: http://your_proxy_address:80 # we use the proxy settings for cluster(optional)
httpsProxy: http://your_proxy_address:80
noProxy: "you can write the address with comma"
compute:
- name: worker
replicas: 0
platform: {}
controlPlane:
name: master
replicas: 1
platform: {}
metadata:
name: cluster_name
networking:
networkType: OVNKubernetes
machineNetwork:
- cidr: "your_subnet_address"
clusterNetwork:
- cidr: 10.220.0.0/14
hostPrefix: 23
serviceNetwork:
- 10.219.0.0/16
platform:
none: {}
bootstrapInPlace:
installationDisk: /dev/sda
pullSecret: "your_pull_secret"
sshKey: "your_ssh_pub_key"STEP-5:
Create new ignition files for new cluster. And copy the file for related folder.
cp install-config.yaml /data/SNO/SNO_4.14/CLUSTERS/hafifbilgiler/installation-components/install-config.yaml
tar -zxvf openshift-install-linux.tar.gz
./openshift-install create single-node-ignition-config --dir=/data/SNO/SNO_4.14/CLUSTERS/hafifbilgiler/installation-components
cp /data/SNO/SNO_4.14/CLUSTERS/hafifbilgiler/installation-components/bootstrap-in-place-for-live-iso.ign /var/www/html/hafifbilgiler.ign
STEP-6:
Edit the conf file from pxe configuration,
vi /var/lib/tftpboot/pxelinux.cfg/defaultDEFAULT clustername
TIMEOUT 20
PROMPT 0
LABEL clustername
KERNEL kernel
APPEND initrd=initramfs.img
coreos.live.rootfs_url=http://your_bastion_machine_ip:port/hafifbilgiler/rootfs.img ignition.config.url=http://your_bastion_machine_ip:port/hafifbilgiler.ign ignition.firstboot ignition.platform.id=metalSTEP-7:
Create The new machine from vmware like below,
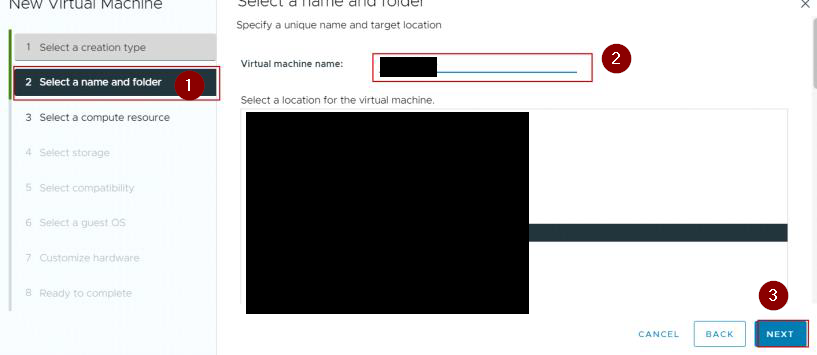
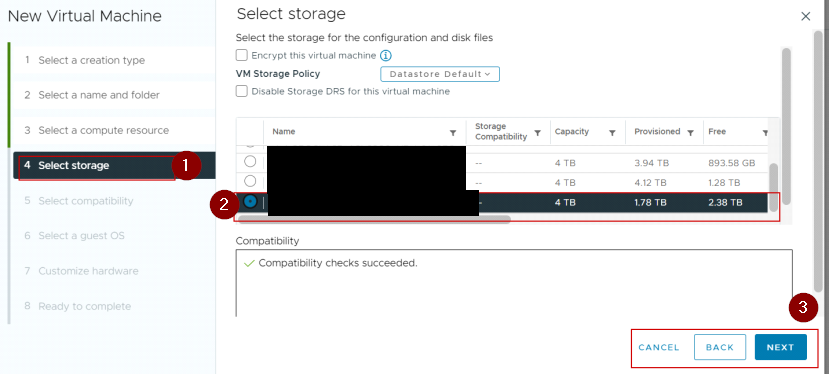

STEP-8:
Obtain the new mac address for dnsmasq server from machine configuration.
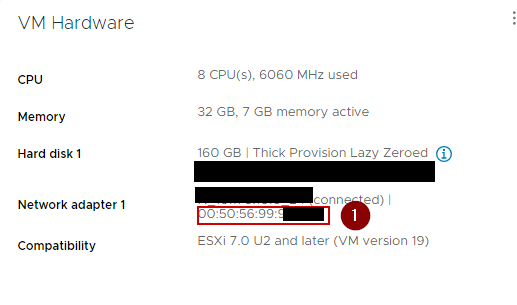
STEP-9:
Obtain the new mac address for dnsmasq server from machine configuration.
enable-tftp
tftp-root=/var/lib/tftpboot
read-ethers
pxe-prompt="Press F8 for menu.", 10
pxe-service=x86PC,"net boot",pxelinux.0
vi /etc/dnsmasq.d/ondemand-sno-hosts.confdhcp-host=mac_address,clustername,ip_address_that_you_used_dns_enrtysystemctl restart dnsmasqSTEP-10:
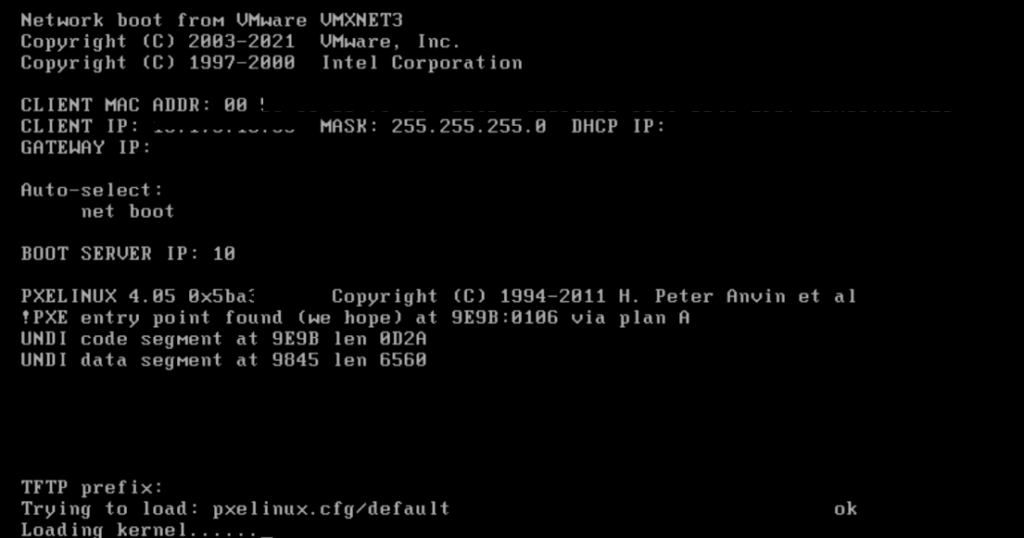
Wait for cluster installation, it will take like 35 -45 minutes.
No responses yet