INFO:This work has been tried on one node and this application will run on kubernetes master node. If you are going to try this installation on a cluster that has a multiple nodes, you should create the mount folders on your choosen worker node or you can use the storage class(recomended). Also if you choose pv and pvc resources you need to use node selector. I will not give information about node selector here. But, you can find a lot of information about pod assign for node on this link.
Let’s try to this installation.
Step1:
Create Docker user and add in your docker group. Because, we will define id number on yaml file for environment.
useradd docker
useradd -g docker docker
Take your id number of docker users.
id docker
List Of Docker User And Group Id
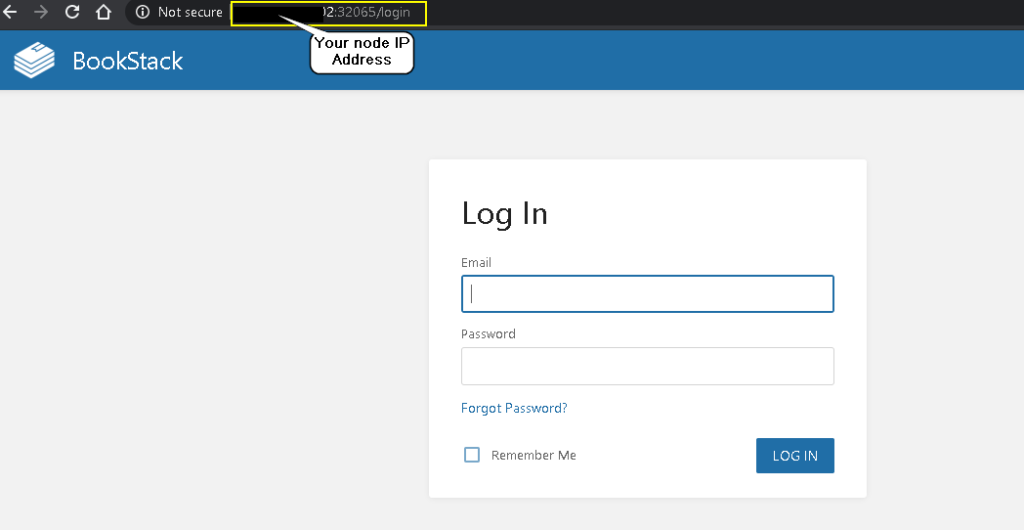
Step2: Create new folder under the worker node. If you have a more than one worker node you must create folder on every each node or you can use node selector to run on specific worker node.
Step4: Create yaml file for database of bookstack.And we will take db pod ip address to use bookstack application yaml file. This is not best practice. If we want to connect the other pod we should create service resources to connect the other pods. Because some pods may die and a new one may up . In this time pod ip address will change. So if we use service, it does not matter even if ip changing because service is matching the pod label.
Tüm yaml’ları aynen alarak denememe rağmen bookstack adam akıllı açılmıyor. WorkerNodeIP: şeklinde gittiğimde invalid redirect hatası verirken, WorkerNodeIP:/login şeklinde gittiğimde ise bozuk bir sayfa açılıyor
Merhaba,
Invalid Redirect hatası pod içerisinde /config/www/.env içerisinde APP URL kısmını bağlatı sağlayacağınız IP ile değiştirimeniz yada Ingress tanımı var ise onunla değiştirmeniz yeterli olacaktır. Son güncellemeler ile uygulama tarafında o kısım aktif gelmekte, buna özel configmap oluşturarakta o kısmı düzeltebilirsiniz.
Great explanations ! It works fine !
But here a question :
If your database pod crashes or if you made a rollout on your deployment, your new pod get a new IP address.
So you had to modifiy your bookstack deployment.
Hi,
Before I want to say thank you for your comment. Yes you are right, when your pod is crash, pod ip address will be changed.Yes we can solve this issue. You can write the service name in the deployment yaml file instead of pod ip address. I forget the update this document. Soryy 🙁
You’re welcome ! When
A tutorial works it is important to say it !
I am a newbie in Kubernetes and I don’t know how to do this…
Could you give me an example or update this document ? I will appreciate it !
Thanks again for your modifications. Now it works !
In addition of your tutorial I create an ingress in order to access to bookstack with domain.name
It works too.
But I would acccess to bookstack over https and not http… I don’t really how… If your know, please let me know ! 🙂
You can follow the “https://hafifbilgiler.com/hafif-bilgiler/kubernetes-and-nexus-repository-integration/” link to define the ingress. If you have certificate, you should create secret with your certificate and your key, if you want to access with selfsigned certificate you can create certificate with “openssl req -x509 -nodes -days 365 -newkey rsa:2048 -keyout /tmp/tls_key.key -out /tmp/tls_crt.crt -subj “/CN=bookstack-app.your-node-ip.nip.io”” command and you can use the you yaml file. For A lot of information you can follow the the above links and you can change the specific field like hostname and tls. After creation secret and ingress, you should go the inside of container and change the url’s field in the .env file. That’s it you can use the bookstack with tls.


8 Responses
Tüm yaml’ları aynen alarak denememe rağmen bookstack adam akıllı açılmıyor. WorkerNodeIP: şeklinde gittiğimde invalid redirect hatası verirken, WorkerNodeIP:/login şeklinde gittiğimde ise bozuk bir sayfa açılıyor
Merhaba,
Invalid Redirect hatası pod içerisinde /config/www/.env içerisinde APP URL kısmını bağlatı sağlayacağınız IP ile değiştirimeniz yada Ingress tanımı var ise onunla değiştirmeniz yeterli olacaktır. Son güncellemeler ile uygulama tarafında o kısım aktif gelmekte, buna özel configmap oluşturarakta o kısmı düzeltebilirsiniz.
Teşekkürler.
Great explanations ! It works fine !
But here a question :
If your database pod crashes or if you made a rollout on your deployment, your new pod get a new IP address.
So you had to modifiy your bookstack deployment.
Is there any way to fix this issue ?
Regards
Hi,
Before I want to say thank you for your comment. Yes you are right, when your pod is crash, pod ip address will be changed.Yes we can solve this issue. You can write the service name in the deployment yaml file instead of pod ip address. I forget the update this document. Soryy 🙁
Best Regards.
You’re welcome ! When
A tutorial works it is important to say it !
I am a newbie in Kubernetes and I don’t know how to do this…
Could you give me an example or update this document ? I will appreciate it !
Many thanks ! See u
Hi again,
Of course, i will update this document immediately. Sorry my fault, sometimes i do not have enough time.
Best regards.
Hello,
Thanks again for your modifications. Now it works !
In addition of your tutorial I create an ingress in order to access to bookstack with domain.name
It works too.
But I would acccess to bookstack over https and not http… I don’t really how… If your know, please let me know ! 🙂
Under my ingress config file :
apiVersion: networking.k8s.io/v1
kind: Ingress
metadata:
name: bookstack
namespace: bookstack
annotations:
kubernetes.io/ingress.class: “nginx”
# nginx.ingress.kubernetes.io/rewrite-target: /
spec:
rules:
– host: bookstack.mydomain.com
http:
paths:
– path: /
pathType: Prefix
backend:
service:
name: bookstack
port:
number: 80
Hi Nicolas,
You can follow the “https://hafifbilgiler.com/hafif-bilgiler/kubernetes-and-nexus-repository-integration/” link to define the ingress. If you have certificate, you should create secret with your certificate and your key, if you want to access with selfsigned certificate you can create certificate with “openssl req -x509 -nodes -days 365 -newkey rsa:2048 -keyout /tmp/tls_key.key -out /tmp/tls_crt.crt -subj “/CN=bookstack-app.your-node-ip.nip.io”” command and you can use the you yaml file. For A lot of information you can follow the the above links and you can change the specific field like hostname and tls. After creation secret and ingress, you should go the inside of container and change the url’s field in the .env file. That’s it you can use the bookstack with tls.